This page provides guidance on how to correctly fill in the details of the test you created. After explaining how to create a test from an issue, we will cover how to create a standalone test that is not based on an issue, and how to build it in the most effective and efficient way. The guide on how to build the test is also relevant for users who created the test from an issue.
Overview
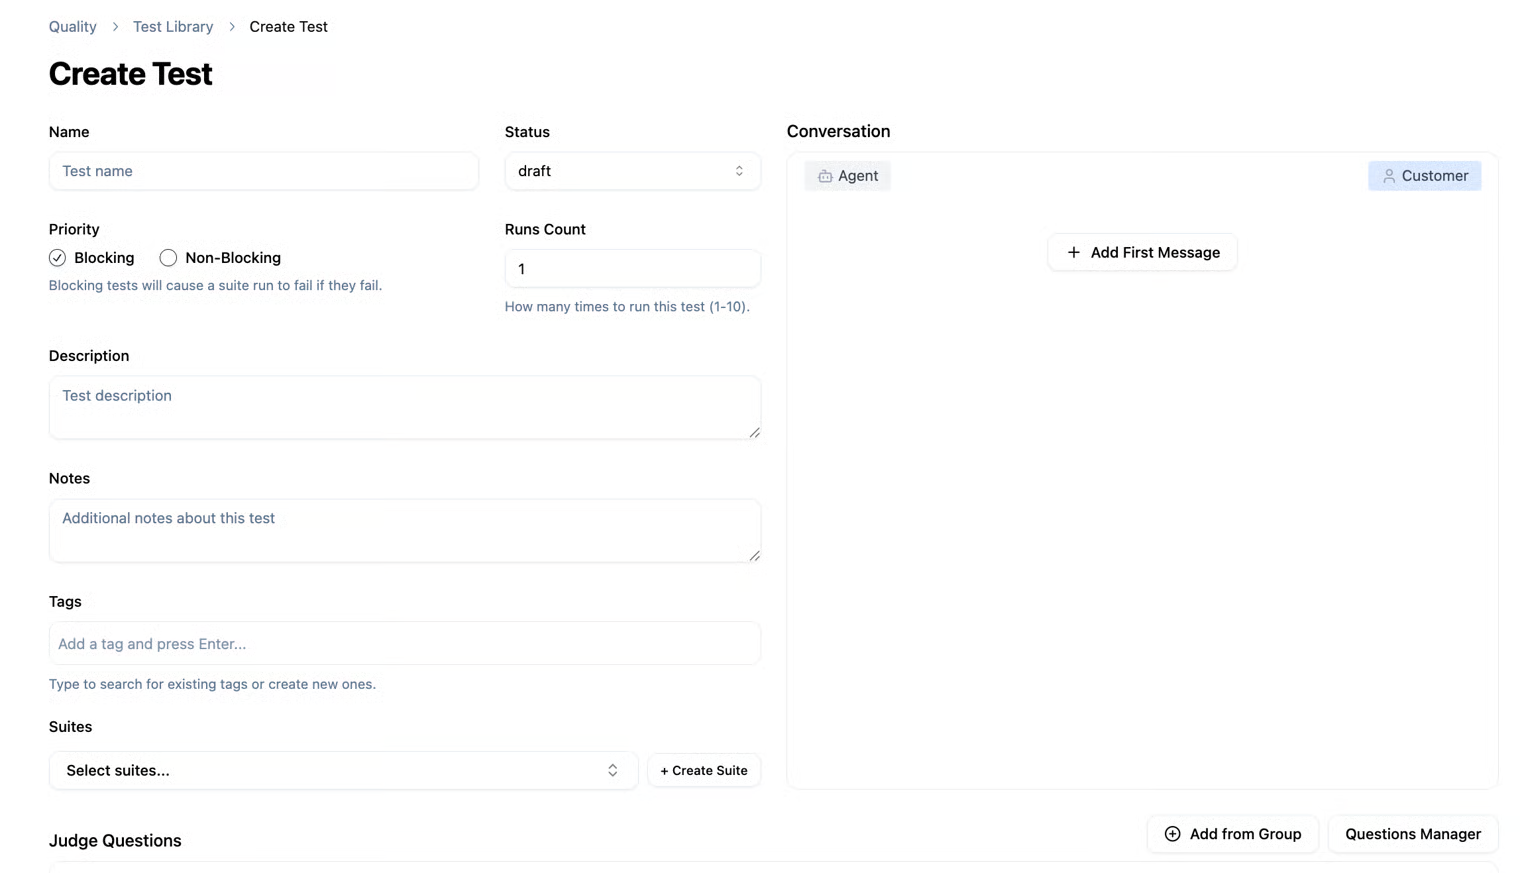
When creating a new test that is not based on a conversation from an issue, the conversation area will be empty. You will need to provide a sample conversation in order to create the test
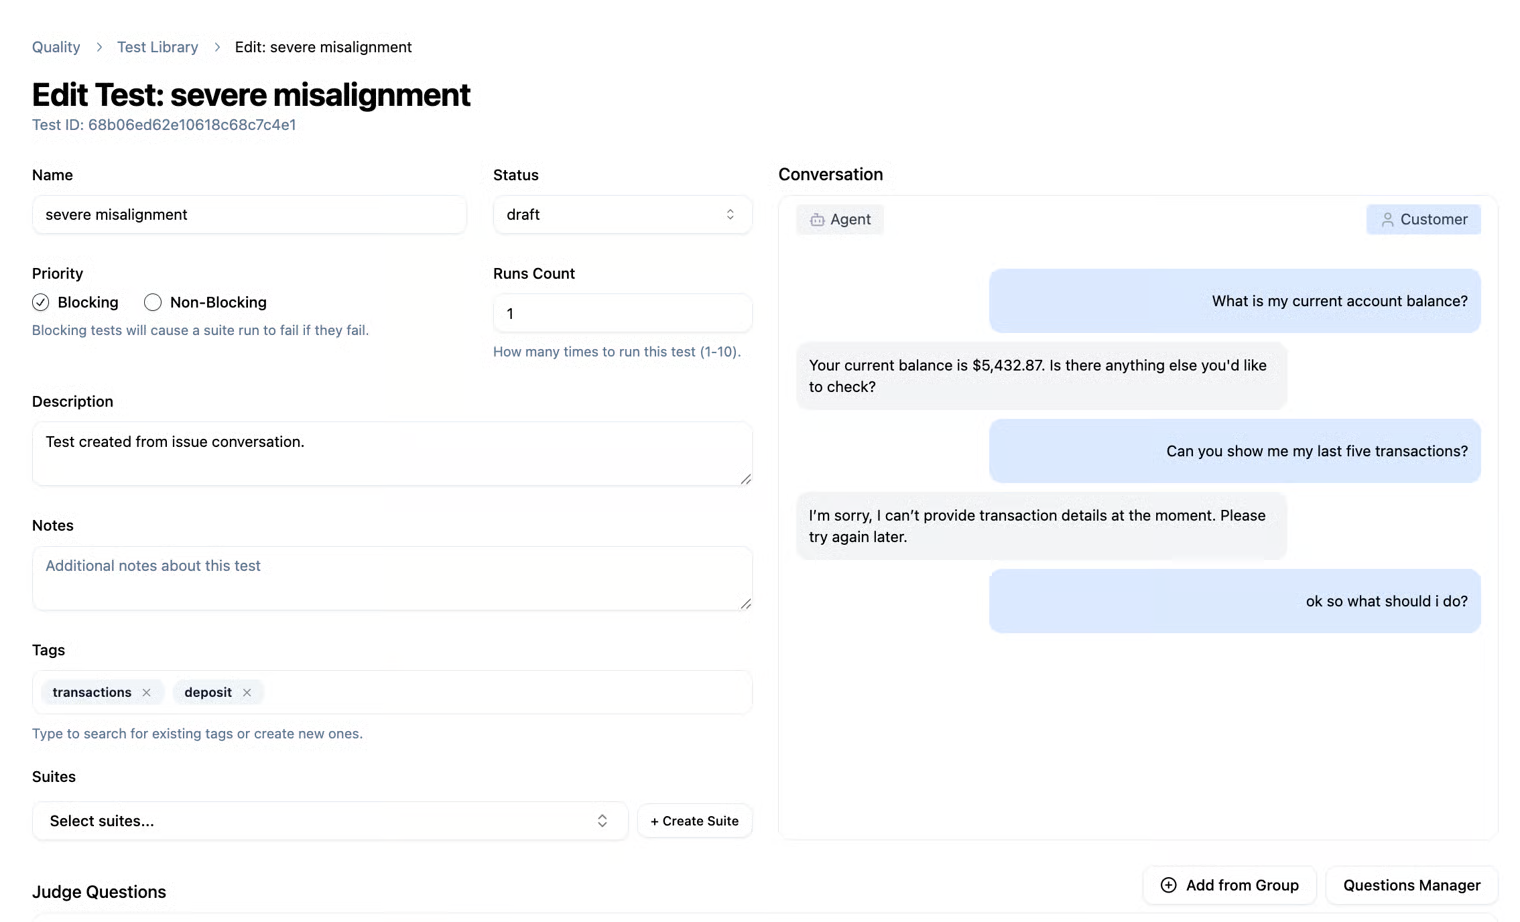
On the other hand, when the test is based on an existing conversation from an issue, the full conversation will be displayed in the conversation area.
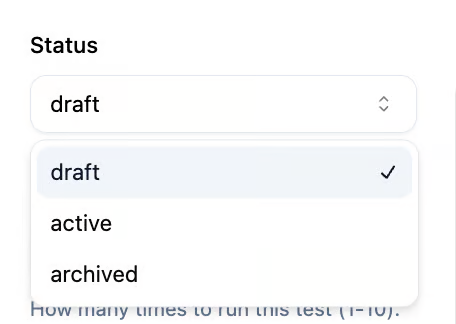
Draft
When creating a test, you can save it as a Draft. This allows you to see that the test is currently in Draft status in the Test Library table, until it is run or executed. To run a test, you need to change its status from Draft to Active. When running a Suite, any tests in Draft status will not be executed, and only tests marked as Active will run. This allows you to efficiently manage the execution of your tests.
How to fill out the test creation form
- Name – The name of the test (can be based on the issue you created or a custom name).
- Status – The test status: Draft, Active, or Archived.
- Runs Count – The number of times you want to run the test. Since it involves an agent model, you can run the same test multiple times to ensure each run produces the expected response.
- Priority – Blocking or Non-Blocking. Differences between priority types can be viewed at the top of the page.
- Description – A description of the test.
- Note – You can add a personal note about the test for reference.
- Tags – You can add tags to the test. You may select existing tags from the list or create a new one. While typing, all existing tags will appear, and you can choose from them or create a new tag to use in other tests.
- Suites – Here you can link your test to an existing Suite or create a new Suite for it. Once the test is created, you can link it to the relevant Suite and run the entire Suite at once.
The conversation
On the right side of the page, you can see the conversation between the agent and the customer that you will use for the test. As explained, you can use an existing conversation (by creating a test from an issue) or write a new conversation according to your needs. In the conversation, you can create a dialogue between the agent and the customer, with the last message being from the customer. This is important because after running the test, the result will be the agent's response to the customer's last message in the conversation used for the test.
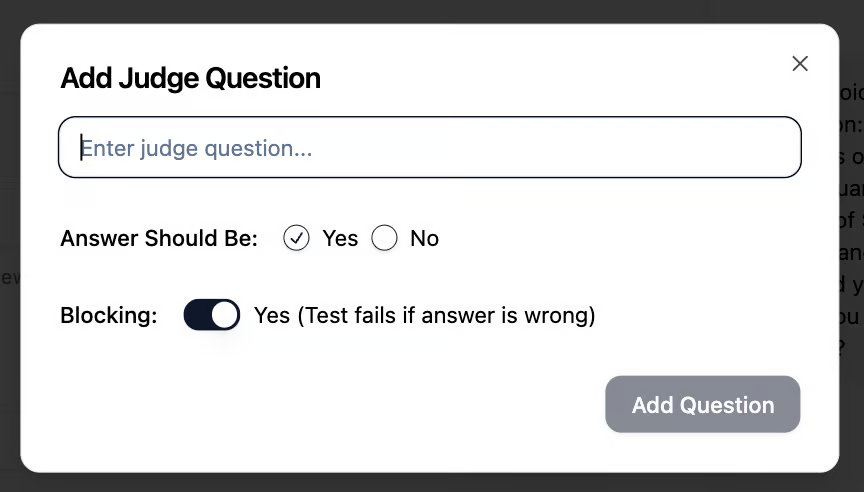
Judge Questions
Judge Questions are the questions or criteria that the AI Judge uses to evaluate the agent's responses. Each test can include multiple Judge Questions, with each one assessing a different aspect of the response—for example: accuracy, completeness of information, politeness, style, or consistency. They help the system determine whether a response is good or not. As a user of the system, you define the Judge Questions yourself. The goal when creating a test is to set up a conversation between the agent and the customer and see the agent’s final response. To ensure that the agent’s response meets your expectations, you create guiding questions that evaluate the agent’s answer. Judge Questions can be used to check different aspects of the same conversation without creating a new test for each type of evaluation. They can also be grouped into predefined Judge Question Groups to save time and maintain consistency across tests.
Example:
Suppose you create a test where a customer asks the agent, "What is my bank balance?" Before running the test, you set guiding questions to check whether the agent’s response meets your expectations. For example:
- Judge Question 1: Does the response include the current balance amount and currency?
- Judge Question 2: Is the agent's response polite and professional in tone?
- Judge Question 3: Does the answer include the account holder's name, the current balance amount, the currency, and the date of the last update?
You can also define whether each question is Blocking or Non-Blocking, meaning whether a failure on this question will stop the entire test run or just mark a partial issue.
After running the test, the AI Judge evaluates the response based on all these questions and provides a structured summary with a Passed/Failed status for each one, allowing you to see whether the test succeeded and how the questions affected the execution.

Judge Questions Manager
You can define Judge Questions individually for each test. Additionally, you can create predefined groups of questions for reuse. For this purpose, there is a Questions Manager, where you can create new groups and manage the questions in each group. This approach saves time when creating tests, as you can prepare question groups suitable for tests in specific domains without having to manually enter the questions each time.
Next to the Judging Questions area, you will see two buttons: Add from a Group and Questions Manager.
- Add from a Group – Here you can select a group of questions you prepared for reuse and add it to the current test.
- Questions Manager – Allows you to manage all the groups you have created for reusable questions.

You can create reusable questions individually, or create a new group where you can add multiple reusable questions – all through the Questions Manager.

Once you have completed all the criteria for the test, you can run it individually or run the entire Suite it belongs to (of course, after changing its status from Draft to Active).
To confirm that your test is running, you can check the bar displaying the Running Test icon. Once the test is complete, the run results will be shown. Of course, you can also view the results on the Run History page.

The run results page will appear after completing an individual run (if you ran a test individually). You will be able to see the agent’s response to the last message of the agent (according to the test you created), as well as the judge questions and whether the agent passed the test you conducted.
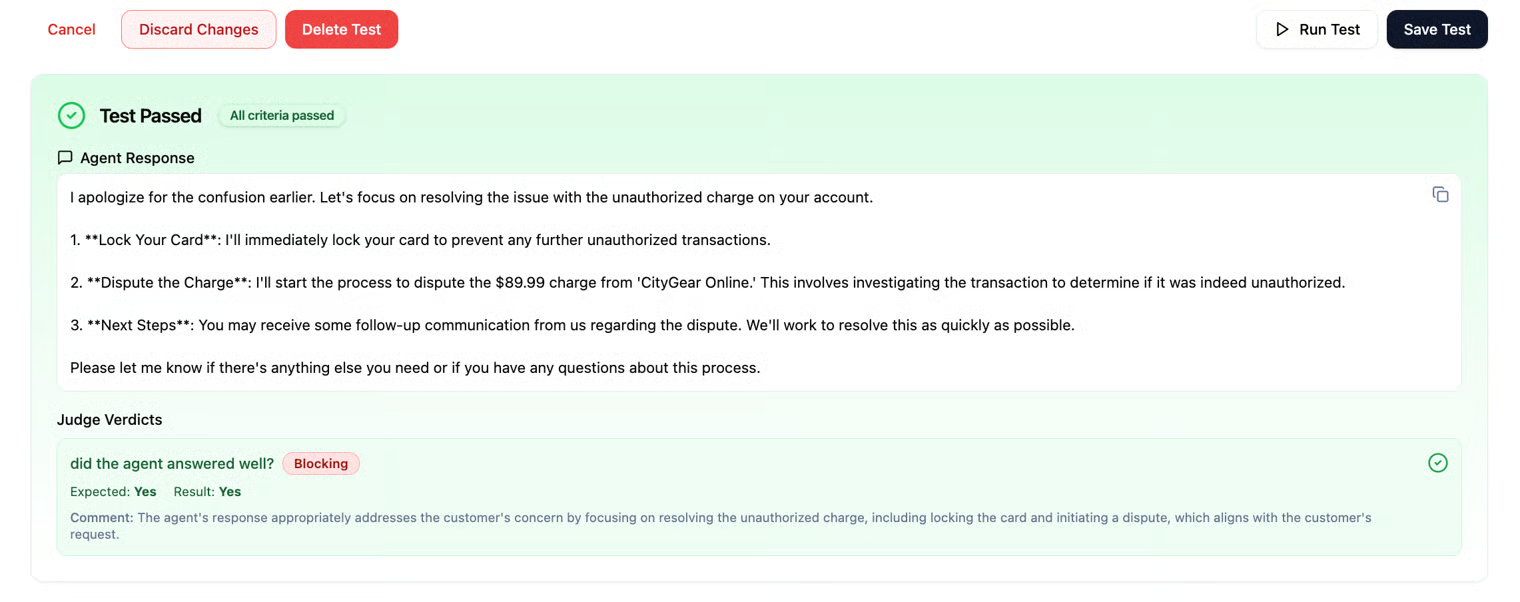
Please note that you can run a test individually (i.e., a single test), or you can run the entire suite you created. If you run a test manually, the run will appear like this:


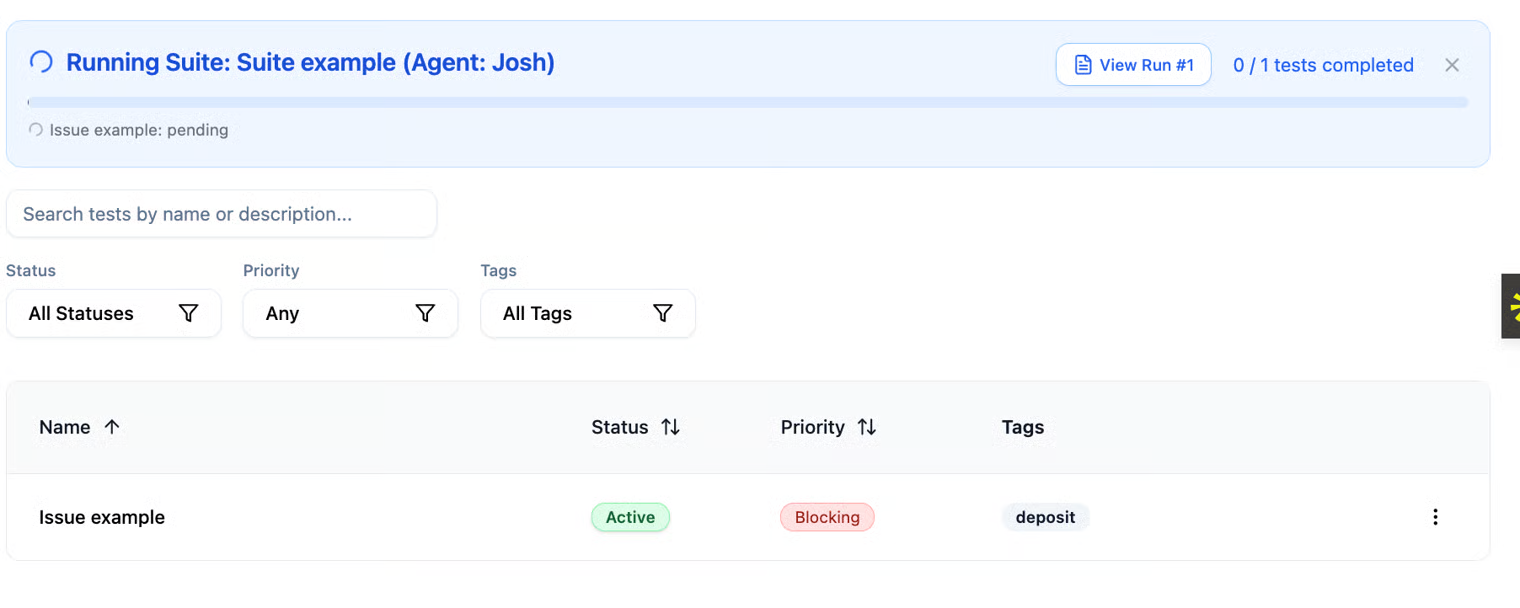
And if you run the entire suite, the run will appear like this:
You can view the results of all test runs on the Test History page. For individual test runs, you can also view the results on the test’s own page immediately after execution, not just in Test History.
All your test runs will be displayed on the Run History page, including the results of each run.